
LightWave 5 is one of the best 3D applications, that was born on the classic Amigas. Plenty of people started their career in CGI and 3D graphics using it. Let's see how this can be configured to run on a PowerPC based Amiga system, running AmigaOS 4.1 FE.
What we need
To get started, we need the following archives, that we are going to use during this guide. Download them into your hard disk.
https://ftp2.grandis.nu/turran/FTP/Non%20TOSEC%20Applications/Archive/Lightwave_v5.20a.lzx
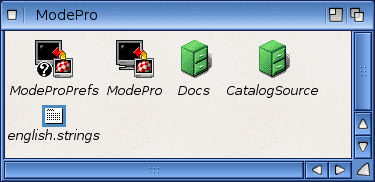
https://aminet.net/package/util/cdity/ModePro
System configuration
Before we install LightWave on our system, we need to prepare it, and make some changes in the preferences.
Firstly, let's enable all the Planar screens to be redirected to RTG. This can be done in the GUI preferences, in the Controls section. Enable the last checkbox in the Miscellaneous list, like is shown below, and then click on the Save button.

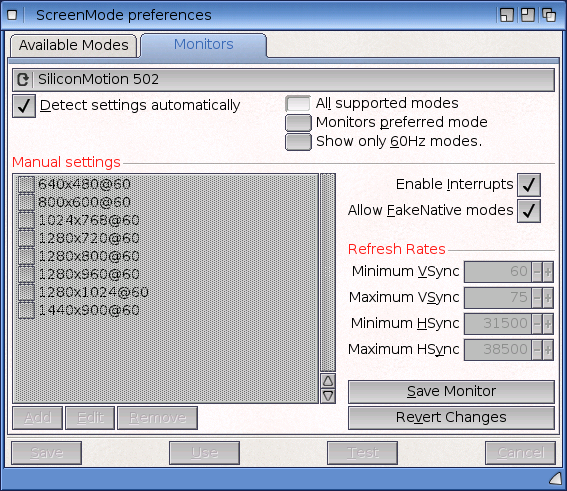
After that, we need to enable the FakeNative resolutions. This will be necessary later when we render in LightWave. Open the Screenmode preferences, and select the Allow FakeNative modes checkbox in the Monitors tab. After that, a reboot is requested. Reboot your system, and continue with the next steps.
Installation
Now that your system restarted, we are ready to extract the archives we downloaded. In my situation, I extracted the ModePro archive in the Utilities drawer and the other two archives in a drawer named Graphics. Of course, you can put them wherever you like.

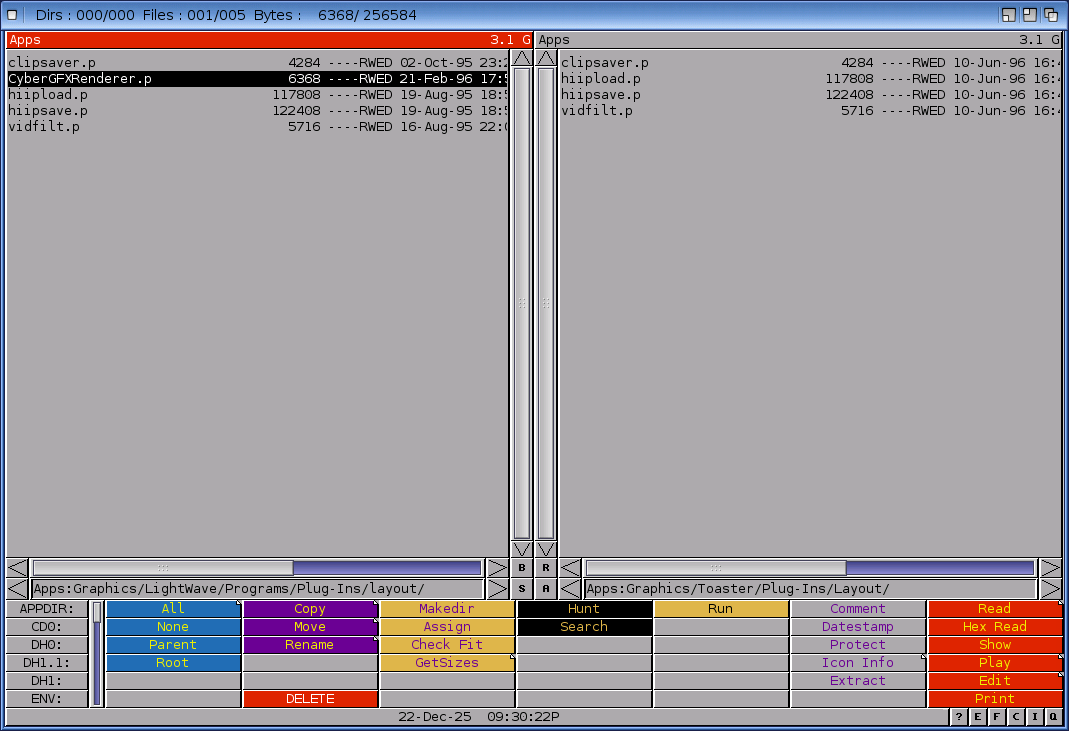
Extracting the two LightWave archives, the Toaster and the Lightwave drawers will be created. We need to get some useful files from the Lightwave drawer and copy them into the toaster.
Copy from the Lightwave/Programs the Documentation and the Utilities drawers into the Toaster drawer

Copy from the Lightwave/Programs/Plug-Ins/Layout the CyberGfxRenderer.p file into the Toaster/Plug-Ins/Layout drawer
After that, you can delete the Lightwave drawer and keep only the Toaster one.
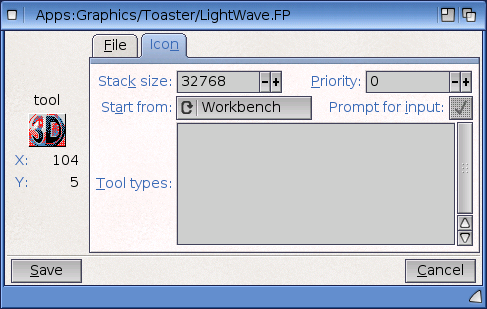
Open the Toaster folder and select the LightWave.FP icon. We need to increase its stack, so opening its icon information from the WorkBench menu (RAmiga + I), we set the stack to 32768 in the Icon tab. This is necessary, especially when we open the Modeler from Lightwave.
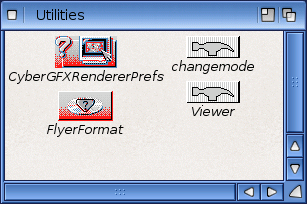
Then, open the Utilities drawer.
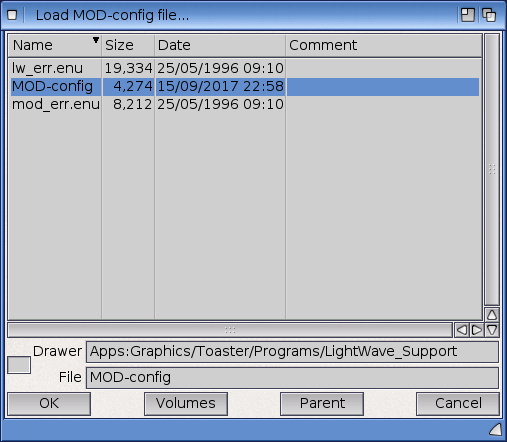
Run the changemode utility, which is going to help us set the resolution for the Modeler. A file requester will appear, asking for MOD-Config. This file is inside Programs/LightWave_Support drawer. Select it and click on the OK button.
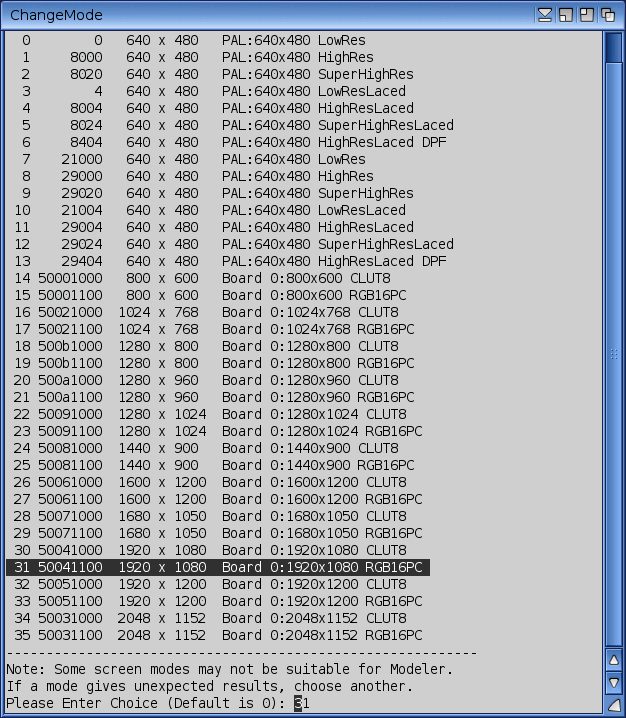
Then a new window will appear with a list of resolutions and their screen ids. Select the one that is the best for your system. On mine, I selected the 1920x1080, which has the number 31 at the side. So, at the prompt, I typed 31 and pressed enter. After that, the window closes.
While we are in the Utilities folder, run the CyberGFXRendererPrefs, which will help us to set the resolution for the CyberGFXRenderer screen. This will be used from LightWave to display the rendered screen, using the CyberGfx plugin we copied earlier.
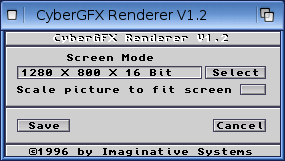
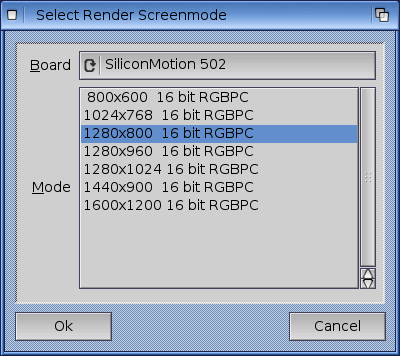
From this window, you can set the preferred resolution by clicking on the Select button. A list of supported resolutions will appear. Unfortunately, they cannot go higher than 1600x1200 pixels. For my system, I selected the 1280x800, as can be seen below. Finally, click on the OK button and then Save.
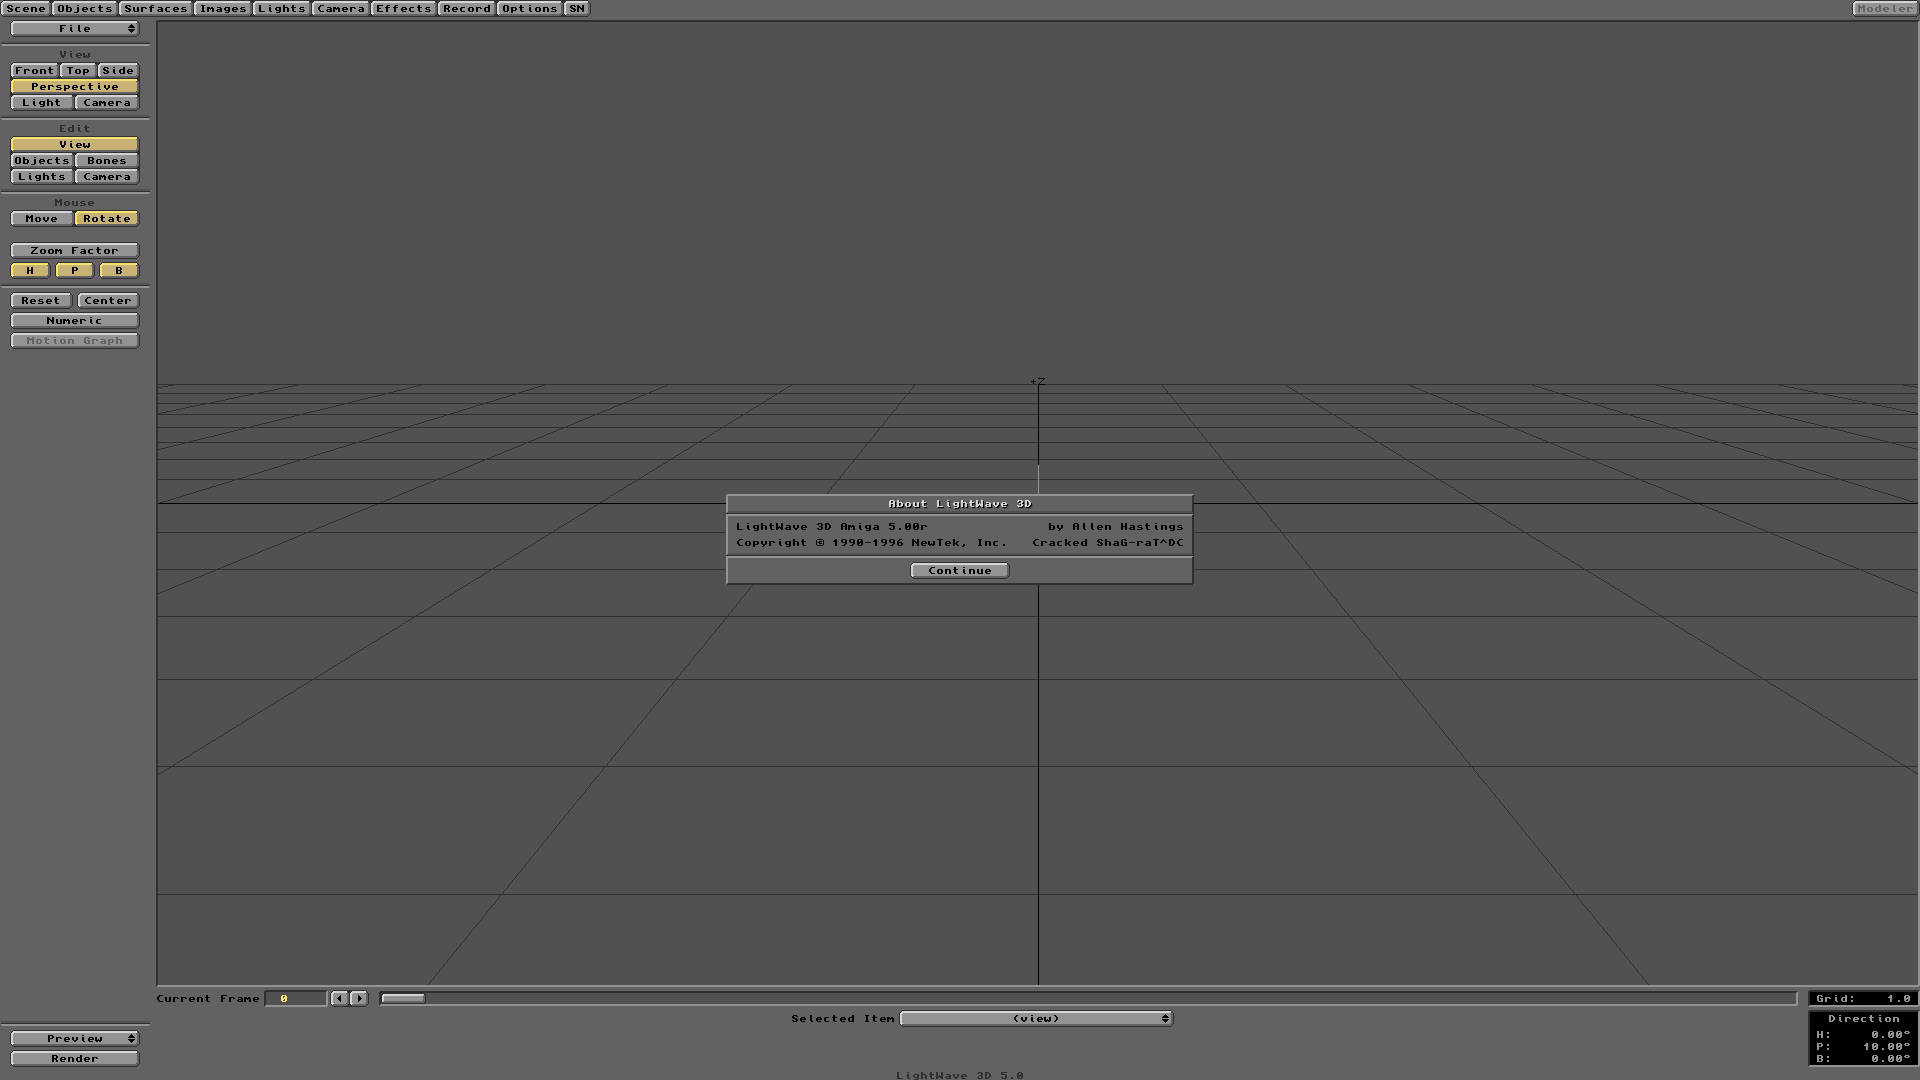
Running LightWave for the first time
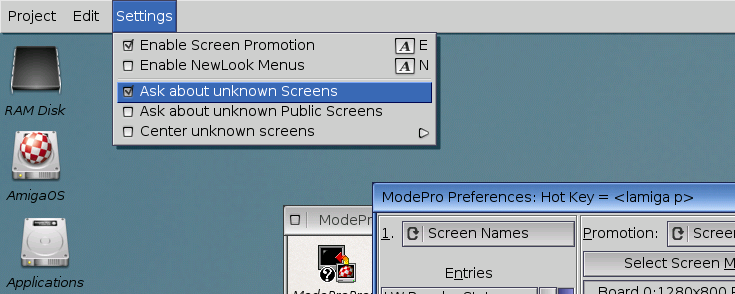
Before we run LightWave, we need to open ModePro drawer and run it. Then we run the ModeProPrefs and keep its window open. ModePro is necessary for promoting LightWave screens to RTG ones, so they can be visible and usable.
Note: AmigaOS 4 has a similar preferences tool like ModePro, but it doesn't support the FakeNative resolutions. So, using ModePro is the best solution. It is recommended to add the ModePro running on WBStartUp.
As soon as you run ModePro, enable from the menu the Ask about unknown Screens option. This will show a requester every time an undefined screen is opening.
Note: After we finish the LightWave setup, this option should be disabled so that you do not get requesters appearing for each opening screen in your system.
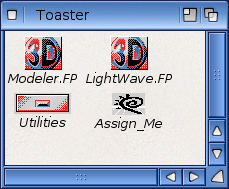
Now it is time to run LightWave. Open the Toaster folder and run... the Assign_Me script. This will not show anything, but will set the Toaster: and 3D: assigns to the same folder. In case you do not want to do it every time you want to run LightWave, put those assigns in your S:user-startup script.
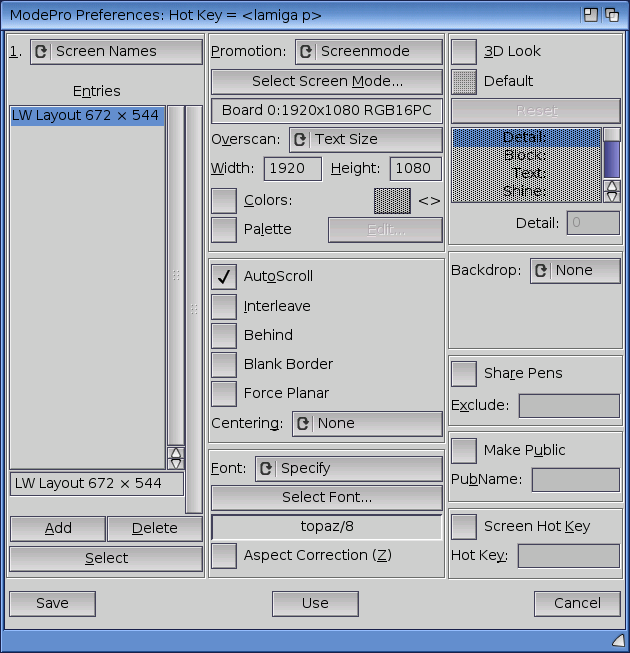
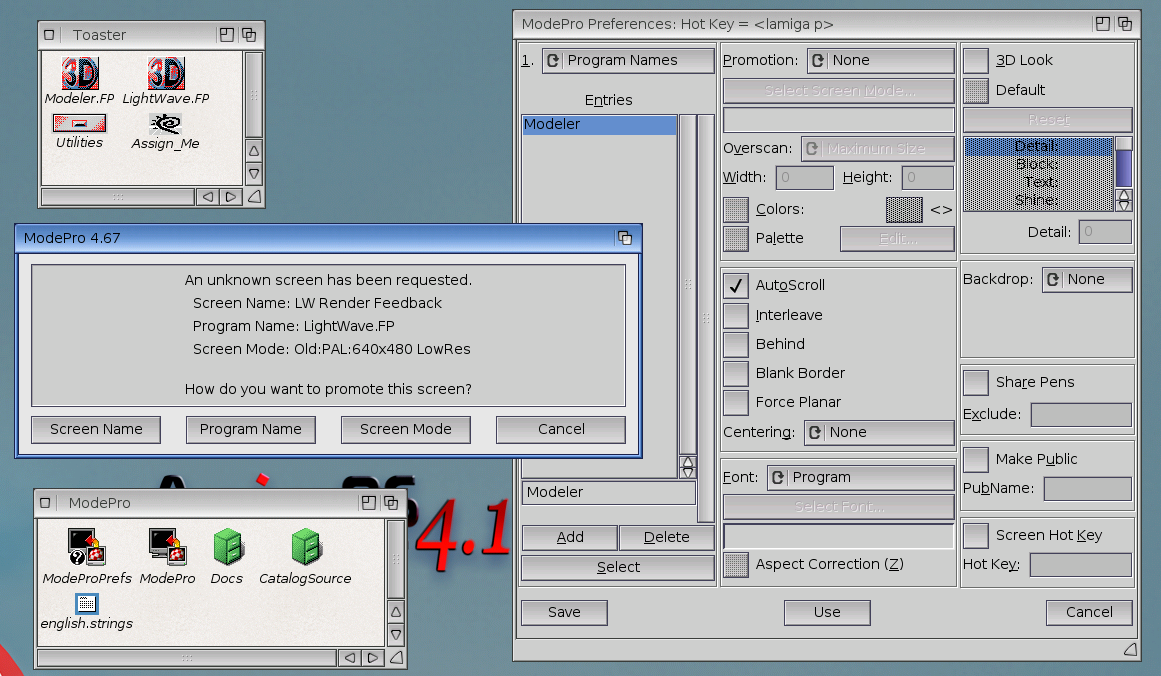
Now, finally, run the LightWave.FP binary. The following dialog will show up from ModePro.
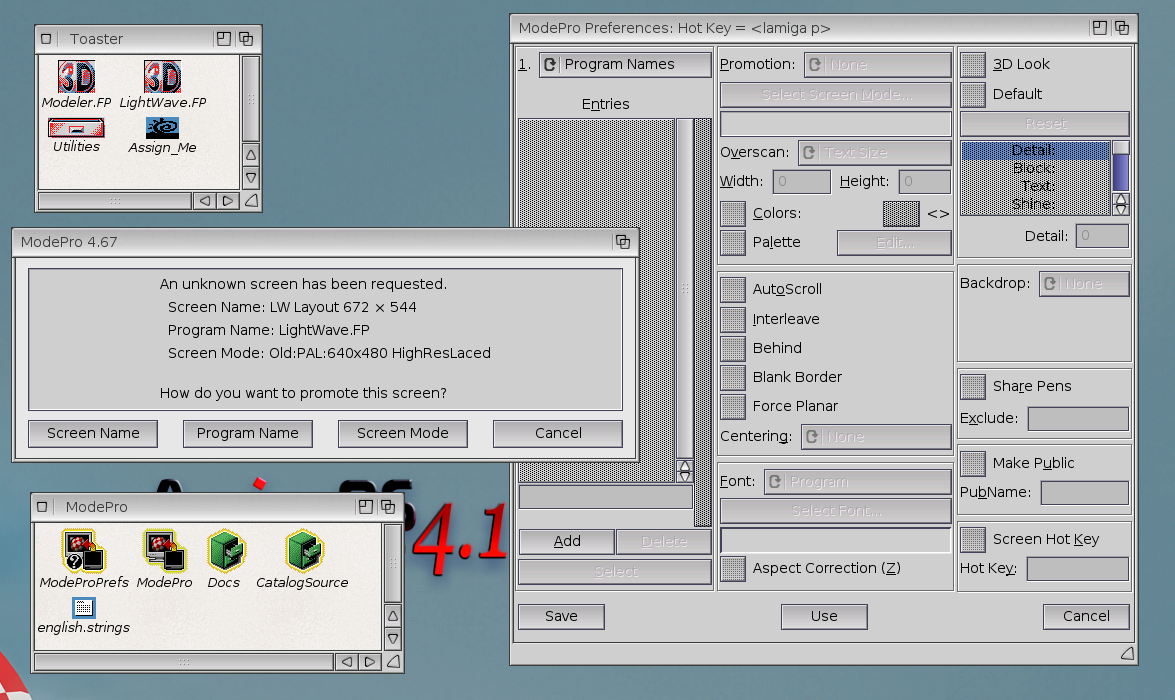
Select the Screen Name button and the ModePro Preferences will be updated. Select the Screenmode value in the Promotion select box, and then set your preferred resolution by clicking on the Select Screen Mode... button. Also, set the font to Specify and select the topaz font, size 8. Click the Save button.
After that, LightWave should open with the desired resolution.
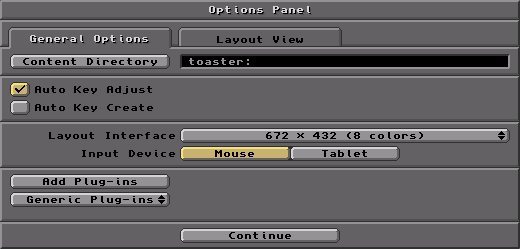
Now, let's add the CyberGfxRenderer plugin. Click on the Options button at the top, and the following window will show up.
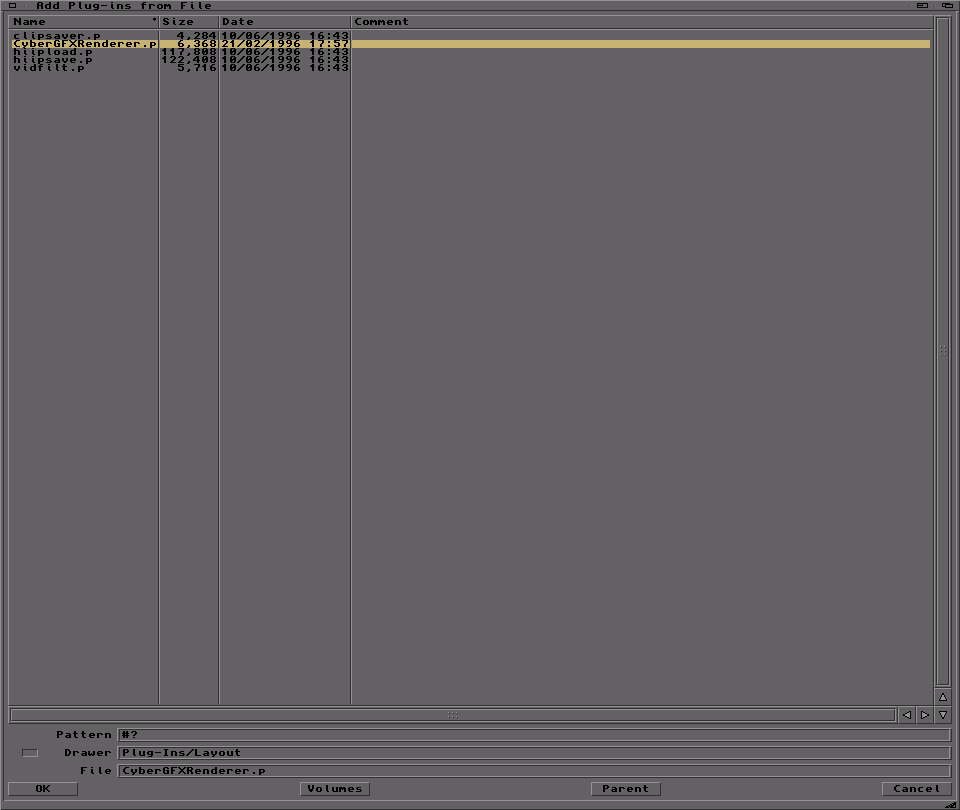
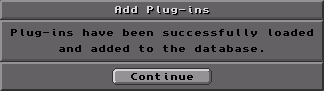
Click on the Add Plug-ins button and select the CyberGfxRenderer.p in the file requester. This can be found in the Plug-Ins/Layout drawer.
Click on continue and you are done.
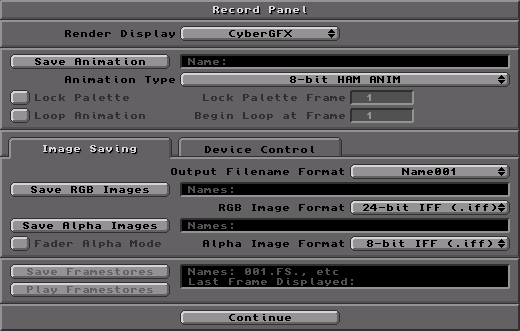
Click on the Record button at the top of the screen to set the CyberGfx renderer, like it is shown below.
In the top-right corner, there is the Modeler button. Clicking on that opens the Modeler, closing the LightWave Layout. If you remember, we already configured the modeler screen resolution, in one of the previous steps. But clicking on it, a requester will appear from ModePro on the Workbench screen. Before we select anything, start the ModePro preferences, in case this is closed.
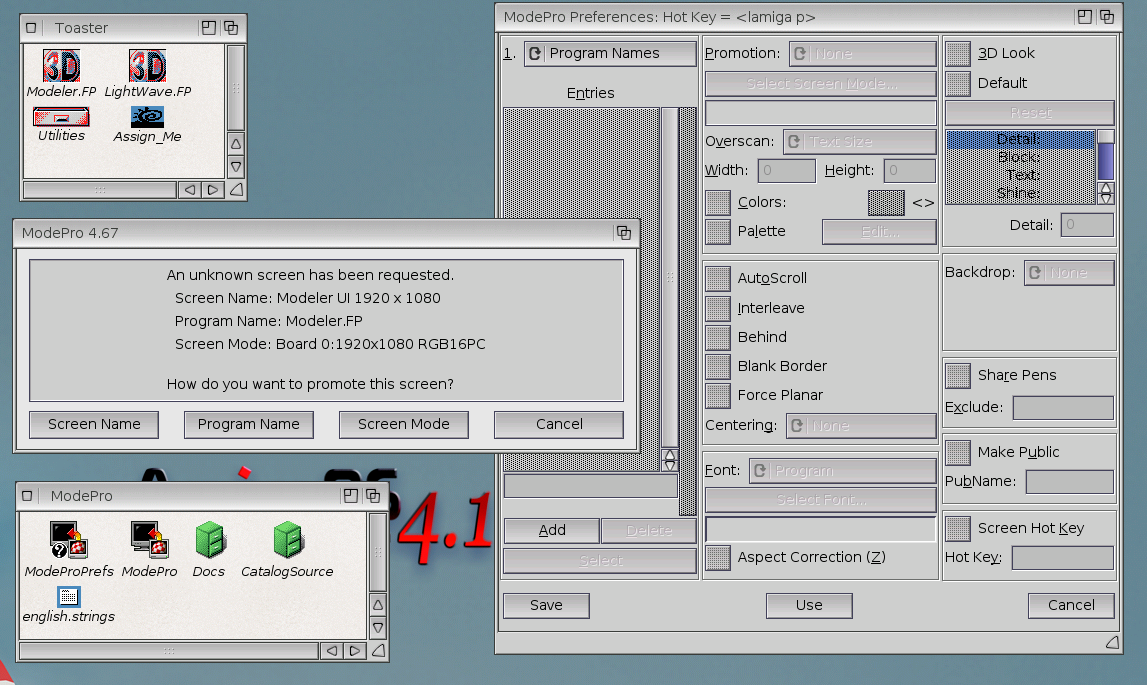
As demonstrated by the screenshot above, the modeler tries to open a screen with a resolution of 1920x1080, which is fine for me. So, I select the Program Name button...
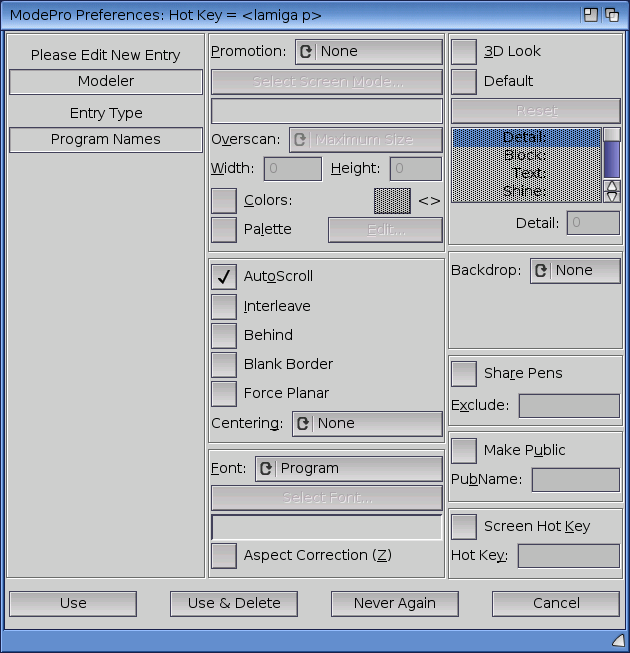
.. and then I set the promotion to None so that no promotion will happen. By clicking on the Use button, the configuration is set. Then the Modeler screen should open just fine.
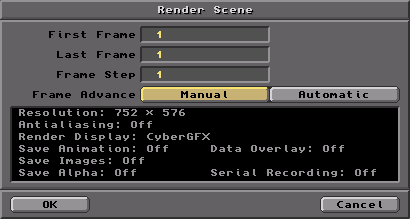
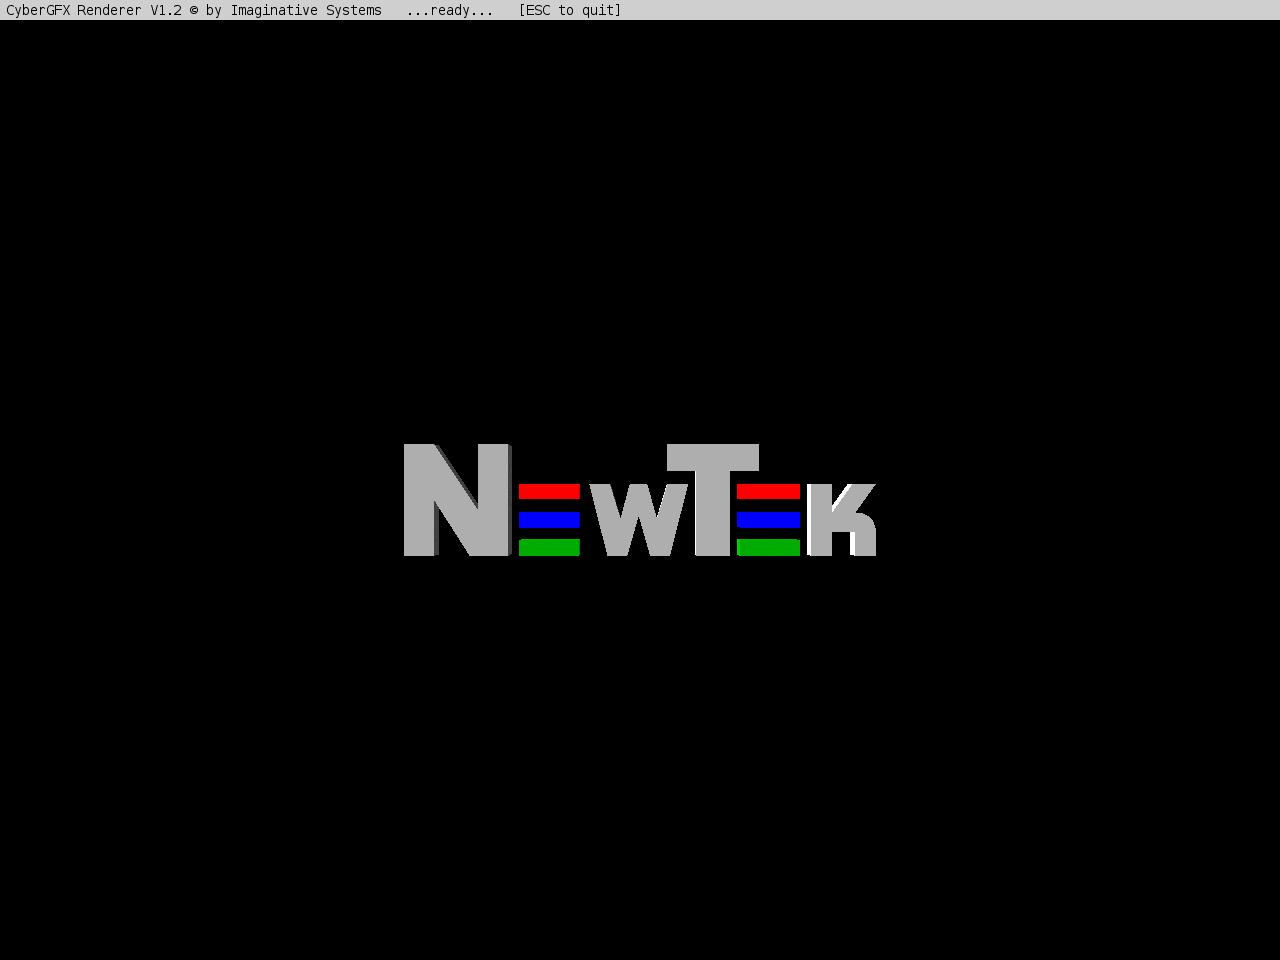
Now, let's go and run our first rendering. Click on the Layout button in the top-right corner to return to the LightWave Layout screen. Import an object in the scene to render, like the NewTek logo. You will find it in the Objects/Tutorials folder. Click on the Render button in the bottom-left corner, and the following window will appear. Set only one frame to render and click the OK button.
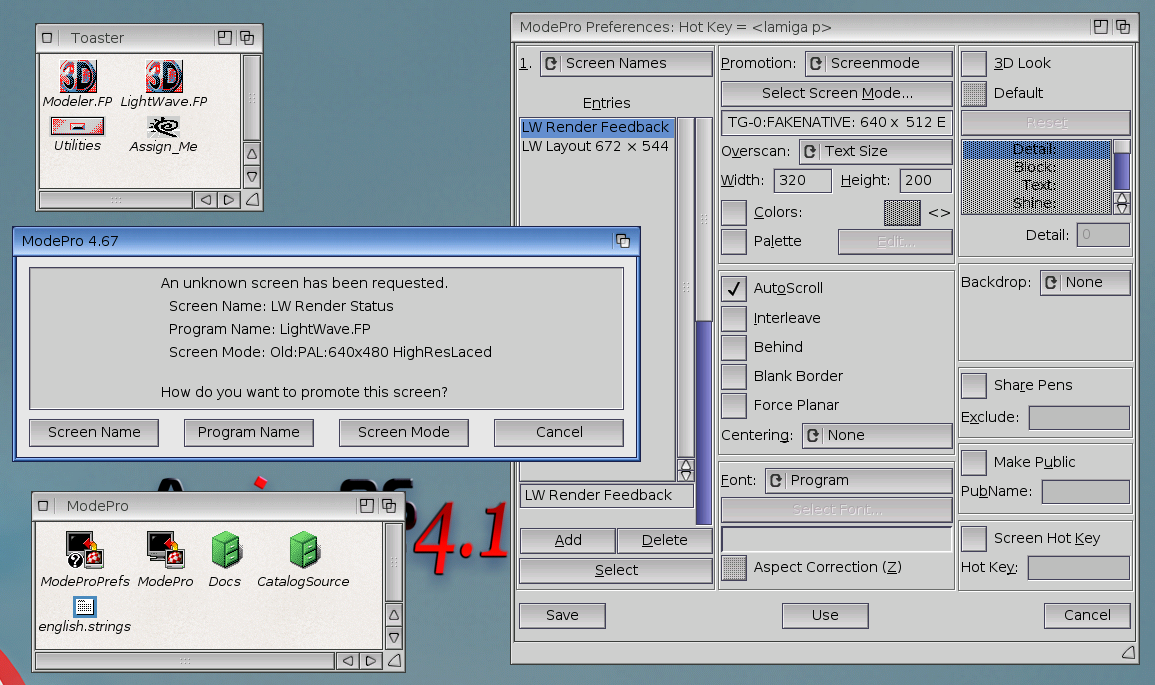
Instantly, a new requester from the ModePro will bring the Workbench screen to the front. This one is about the LightWave Render Feedback screen, which is the one that shows the image being rendered.
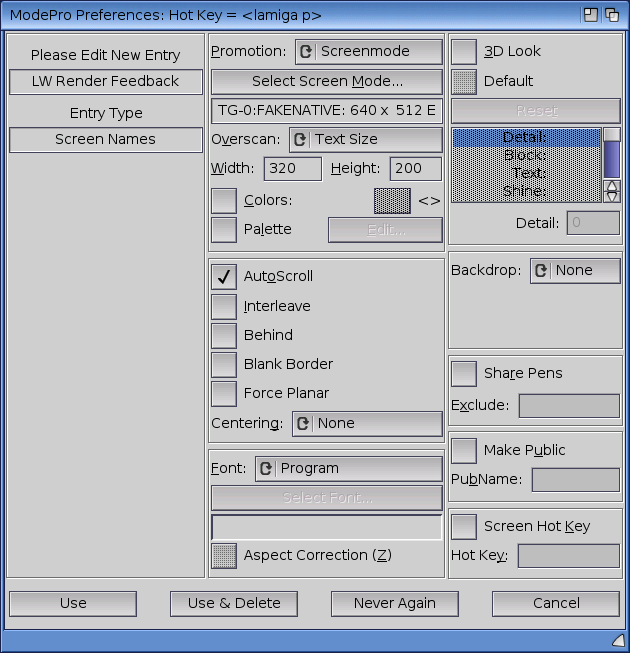
This should be configured to use one of the FakeNative screens. Below you can see how I configured it. I selected the FakeNative 640x512 EHB Interlaced resolution. I set the width and the height to 320x200 respectively. Click on the Use button to apply the configuration.
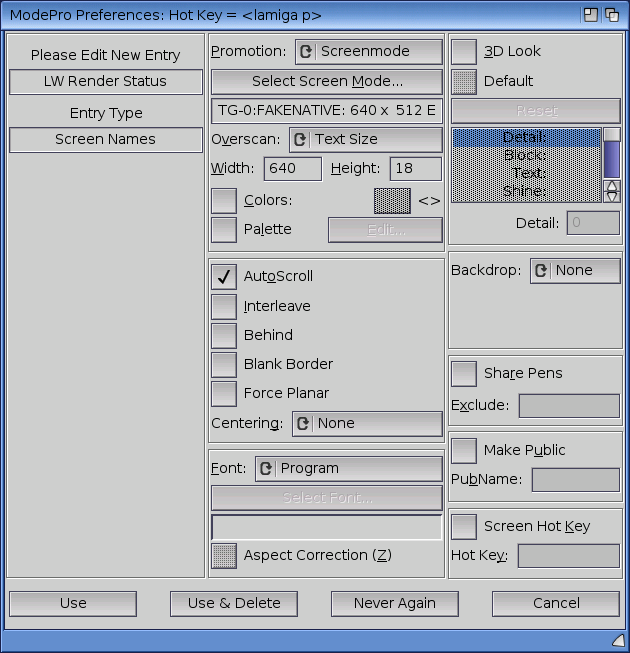
After that, one more requester will appear, about the LightWave Render Status screen, which is a small screen, usually visible at the bottom, showing information about the status and the progress. For this, I clicked on the Screen Name button...
...and I set the promotion to the FakeNative 640x512 EHB Interlaced resolution as well. I set the width and the height to 640x18 respectively, since this should not take the full screen. Click on the Use button to apply the configuration.
After that, one more requester will show up for the CyberGfxRenderer screen.
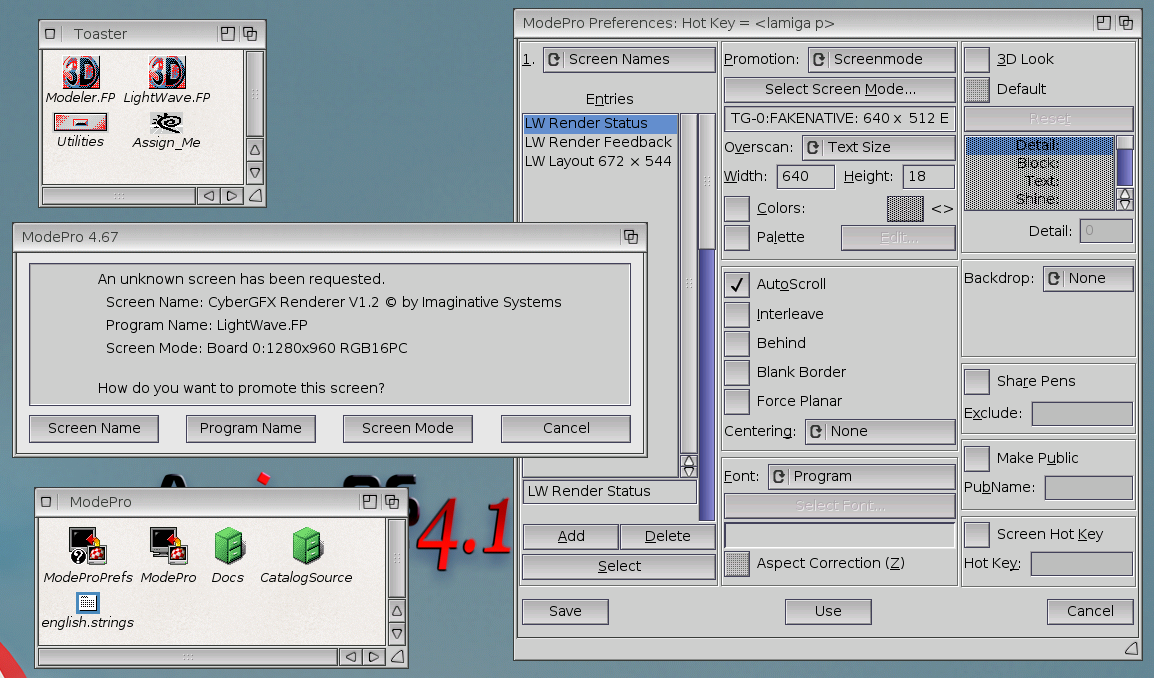
Since this one was set before to have a specific resolution supported by the RTG, I clicked on the Screen Name button, and set it to have no promotion, like it can be seen below.

After that final step, all the screens are defined. The rendering should be started in LightWave, and everything should work fine. The final image should open in the CyberGfx screen.
Using the LAmiga + M you can switch between the different screens. Switch to the Workbench screen and to the ModePro preferences window. Disable from the menu the Ask about unknown Screens option, and save the configurations. Don't forget to add ModePro in the WBStartUp so that you do not need to start it manually every time you want to run LightWave.
Also, the Modeler UI and the CyberGfxRenderer screens can be removed, since they are not promoted, and since you have disabled the Ask about unknown Screens menu option.
Additionally, some of the promoted screens can be configured in the AmigaOS 4 Preferences/Screens tool, except the ones that are configured to use the FakeNative resolutions.
After all the steps, LightWave should work fine on your system, and the rendering can be initiated from within the application using the render button or the F9 key. If you like, you can experiment with the screens and the resolutions, to make it work better for your system. Especially with the FakeNative ones, which might work diferently for you.
Acknowledgements
The above guide was created based on experimentation and mbrantley's guide and video, whom I would like to thank for sharing it all these years ago, which is still relevant.
Furthermore, I would like to propose Muadib's YouTube channel, that has plenty of tutorial videos for Lightwave, doing incredible things.
For better-looking icons, have a look at the Masonicons Collection 2009-2010, created by Martin Merz.
You can find more Amiga 3D graphics aficionados at the AmigaRayTracers forum, sharing the passion of creating 3D animations and images on Amiga. Go and say hi.
Happy rendering everyone.