|
|
|
|
|
|
|
|
|
|
|
|
|
|
|
|
|
|
|
|
|
| OS4depot Feed |
|

thumbnailmaker.lha - video/misc
Apr 27, 2024 mce.lha - game/utility
Apr 23, 2024 theme_list.lha - utility/misc
Apr 23, 2024 faac.lha - audio/convert
Apr 22, 2024 faad2.lha - audio/convert
Apr 22, 2024 seq.lha - audio/misc
Apr 22, 2024 libfaac.lha - development/library/audio
Apr 22, 2024 libfaad.lha - development/library/audio
Apr 22, 2024 image2pdf.lha - utility/text/convert
Apr 22, 2024 libharfbuzz.lha - development/library/graphics
Apr 20, 2024
|
|
|
| Donations |
|
If you appreciate this site please consider to

|
|
|
|
 |
ROM Puller Instructions
Grab this as PDF
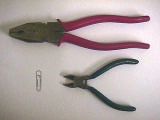
You will need:
- A paperclip
- Some flat nosed pliers
- Some wire snips
|
|
|
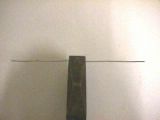
Straighten out the paperclip and grip it in the middle with the pliers.
|
|
|
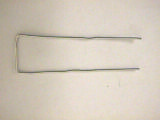
Bend down each leg at right angles to the plier jaws. Trim the legs with the wire snips so they are the same length.
|
|
|
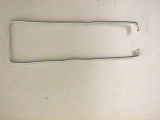
Bend the end of each leg in at 90 degrees as shown and clip each `ear' back to about 2mm in length with the wire snips .
|
|
|
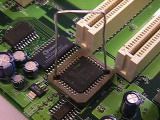
Remove any PCI cards from your AmigaOne and put the ROM puller in position across the diagonal of the ROM socket as shown. The `ears' should tuck in under the ROM itself. Note that the bevelled locating corner of the socket is at the lower corner of the socket nearest the edge of the board - that is the socket corner which is at the bottom of the picture.
|
|
 Finally pull the ROM out with the forefinger of one hand whilst steadying the ROM horizontally with your other forefinger.
When inserting the replacement ROM, make sure the bevelled corner lines up with the bevelled corner of the socket.Place the ROM on the socket so that its metal `legs' line up with the metal contact strips in the socket. Then push firmly home so that the top of the ROM is flush with the top of the socket.
|
| © Eyetech Group Ltd 2003, 2004 |
|
|
