It may seem odd to bother with wireless networking on our next-generation Amigas; after all, they are -- at least for the moment -- all sedentary desktop systems. But wireless networking is still a very useful add-on, even if our machines don't see too much movement. For one thing most homes already have a wireless router, and having wireless capabilities on our Amigas mean being able to place it anywhere in the home or office we choose, without worrying about Ethernet cables.
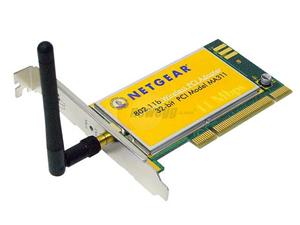
The first thing is to grab a copy of the Prism2 driver package, courtesy of Neil Cafferkey. The driver supports nearly any PCI-based networking card that uses the Prism2 chipset. You can download a copy on OS4depot. In the archive you'll find an AmigaGuide manual that spells out which PCI cards are supported, and which aren't. For our purposes here we're using a NETGEAR MA-311 card. It may have been discontinued some time ago, but there are so many floating around, you'll find one on eBay or Google Shopping quite easily. I've picked up a couple over the years, and they never cost me more than $20USD.

Assuming you have your PCI card installed, you'll need the following information before proceeding:
- the name, the SSID, of your router
- the security method for connecting, if any
- the password or key for connecting
- the IP address of your DNS server
Make certain that your router uses an authentication method supported by the prism2.device driver. The driver currently supports WEP, WPA, and WPA2 authentication methods including both TKIP and CCMP (AES) encryption modes. Once you have this info written down somewhere, you can simply double-click on the 'Install' icon, and the driver will be installed along with a command-line tool to manage authentication to your router.
Now this is where it gets a little tricky. Installed along with the driver is the WirelessManager tool. This sets up your PCI card with the correct authentication information prior to any connection attempt. If you are using AmigaOS 4.1 Update 5, this is a little easier. Simply edit the S:Network-Startup script so that it looks like this:
; $VER: Network-Startup 53.2 (01.06.2011)

Run <>NIL: C:WirelessManager prism2.device
AddNetInterface QUIET DEVS:NetInterfaces/~(#?.info)

; Add below this line applications that need a running network
Notice that the call to the WirelessManager tool must go before the AddNetInterface call. If you don't do this, it will not work properly. During driver installation, the installer should have allowed you to create the parameters file for your network that describes the network name, authentication method, and password. If you skipped over that, no problem, we'll go ahead and create it now. In a text editor create a new file to be saved as ENVARC:Sys/Wireless.prefs. Depending on the type of authentication used you'll want to create an entry for your router that corresponds to one of the examples below:
# A WPA-encrypted network with a textual passphrase
network={
        ssid="mynet1"
        key_mgmt=WPA-PSK
        psk="yOuRsEcRetwpAKeY"
}

# A WEP-encrypted network with a hexadecimal password
network={
        ssid="mynet2"
        key_mgmt=NONE
        wep_key0=123456789abcdef123456789ab
        wep_tx_keyidx=0
}

# A WEP-encrypted network with a textual password
network={
        ssid="mynet3"
        key_mgmt=NONE
        wep_key0="yourpassword1"
        wep_tx_keyidx=0
}

# Match any unencrypted network
network={
        key_mgmt=NONE
}
So at this point you should have the driver installed, your authentication parameters defined and saved, and your network startup script properly modified. At this point go ahead and bring up a shell (or use the 'Execute Command' option in the Workbench) and type WirelessManager prism2.device. You won't have to do this again on subsequent boots of your system, just this one time. Now we'll configure the AmigaOS Internet prefs tool to use our wireless card for networking purposes.
For some reason folks tend to have a little difficulty adding or modifying networking options on the Amiga -- which is surprising considering how easy it is. So we'll try a step by step approach, complete with plenty of screenshots. First thing: open the Internet prefs tool in your Prefs drawer on your System disk.

Figure 1: Internet Prefs Tool
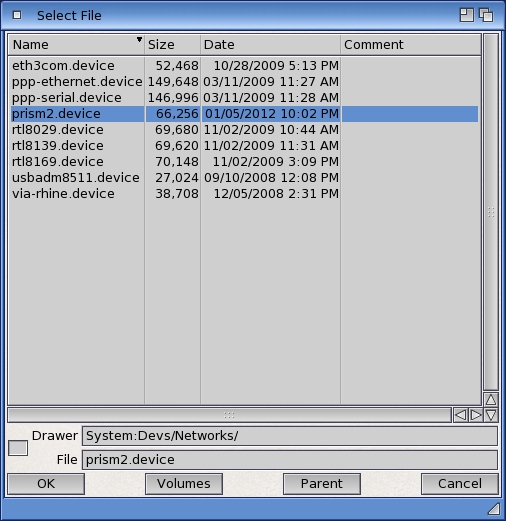
Click on the 'New...' button as shown above. This is where we will configure the TCP/IP stack to use the prism2.device driver. In the window that appears name your connection something useful. In our example, since we're assuming the system is at home, I've named the connected 'Home' for now. Click on the little gadget that looks like a file on the 'Device driver' line. In the ASL requester that pops up, choose prism2.device:

Figure 2: Device Requester
Make certain that the 'device type' is labelled 'Ethernet' and you've selected unit '0.' Lastly, unless you really want to assign your Amiga a specific static IP address and have done all of the necessary configuration on your router, select the check box next to 'try dynamic configuration (DHCP)' instead. This will let your router attempt to dynamically assign you an IP address and possibly also provide the address of your DNS server. The window should look like this:

Figure 3: Interface Setup
The next step is optional, but recommended. You should probably already know the IP address of your DNS server. In most cases it is the IP address of your router. Since you selected DHCP before this step is usually not necessary, but better safe than sorry. In the example below I've added my router as the primary DNS server by selecting the 'Name Resolution' option in the left pane of the Internet prefs tool, and added the router's IP address by clicking on the 'New...' button. The result looks like this:

Figure 4: DNS Options
Finally click on the 'Save' button at the bottom. The Internet prefs tool will ask if you want to restart the TCP/IP stack. Click the 'Yes' button:

Figure 5: Restart Requester
A small shell window will pop up. If all is successful, after a few seconds, it will print out your new IP address, and you can go browser the 'net wirelessly. If everything was set up properly as detailed in this article, every time you boot your AmigaOne, you'll be automatically connected to the Internet 'over the air' and you can give up CAT5 cables for good! :-)
Written by:
Eldee Stephens (a.k.a. 'eliyahu')
08/09/12
